Set Up a Professional Music Studio at Home
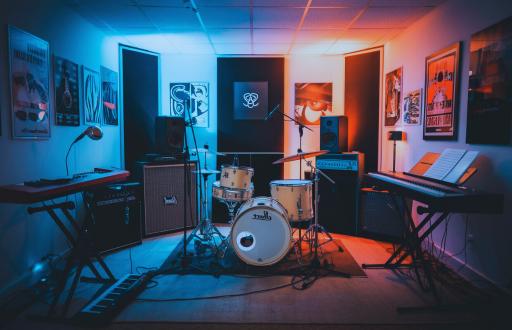
In the digital age, the dream of creating music from the comfort of your own home is more attainable than ever. Whether you’re an aspiring artist, a seasoned producer, or simply someone who loves to experiment with sound, setting up a professional music studio at home can be a rewarding venture. This guide will walk you through the essential components, considerations, and tips to create a space that not only inspires creativity but also meets the technical demands of music production.
Understanding Your Space
Assessing Your Room
Before diving into the world of gear and software, it’s crucial to evaluate the space you have available. The room you choose will significantly impact your sound quality. Here are some factors to consider:
- Room Size: Larger rooms can provide better acoustics, but they may also require more treatment to manage sound reflections. Conversely, smaller rooms can be easier to control but may need careful planning to avoid muddiness.
- Shape and Layout: Rectangular rooms are generally better than square ones, as they help reduce standing waves. Think about the layout of your studio—where will your desk go? Where will your speakers be placed?
- Natural Light and Ambiance: While sound is paramount, don’t underestimate the importance of a pleasant working environment. Natural light can boost your mood and creativity, so consider a space with windows or good lighting.
Soundproofing vs. Acoustic Treatment
It’s essential to distinguish between soundproofing and acoustic treatment. Soundproofing aims to prevent sound from entering or leaving a room, while acoustic treatment focuses on improving the sound quality within the room. Depending on your needs, you may want to invest in both.
- Soundproofing: This can involve adding mass to walls, sealing gaps, and using soundproofing materials like mass-loaded vinyl.
- Acoustic Treatment: This includes using foam panels, bass traps, and diffusers to manage sound reflections and improve the overall acoustics of your space.
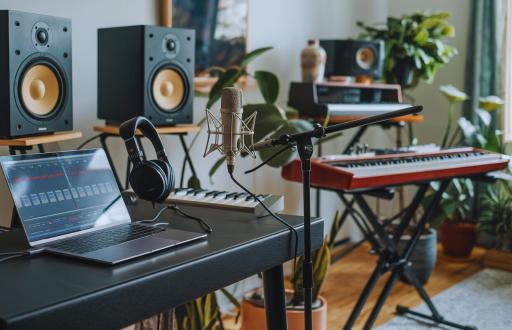
Essential Equipment for Your Home Studio
Now that you have a space in mind, it’s time to gather the tools of the trade. Here’s a breakdown of the essential equipment you’ll need for effective music production:
1. Computer
Your computer is the heart of your studio. Whether you prefer a Mac or PC, ensure it has sufficient processing power and RAM to handle demanding software. A solid-state drive (SSD) can significantly improve load times and overall performance.
- Recommended Specs: Aim for at least an Intel i5 or AMD Ryzen 5 processor, 16GB of RAM, and a dedicated graphics card if you plan to use video editing software alongside your music production.
2. Digital Audio Workstation (DAW)
Choosing the right DAW is crucial. Popular options include Ableton Live, Logic Pro, and FL Studio. Each has its unique features, so explore them to find the one that resonates with your workflow.
- DAW Features to Consider: Look for features like MIDI support, audio recording capabilities, built-in effects, and a user-friendly interface.
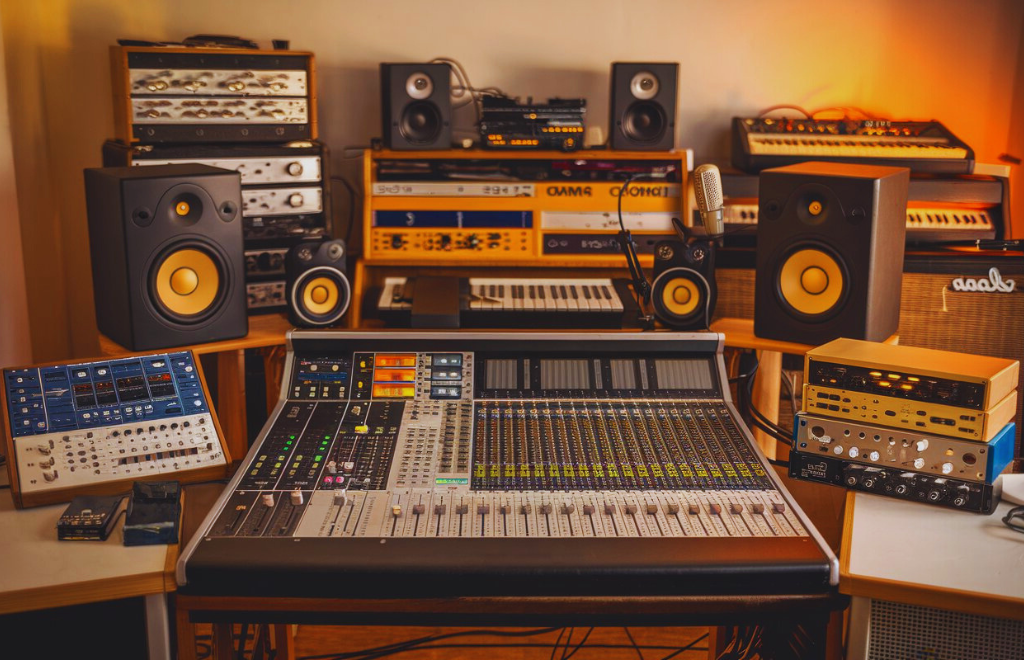
3. Audio Interface
An audio interface acts as the bridge between your computer and your instruments. It converts analog signals into digital data, allowing you to record high-quality audio. Look for interfaces with low latency and multiple input/output options.
- Key Features: Consider the number of inputs and outputs, the quality of the preamps, and whether it supports MIDI connections.
4. Monitors and Headphones
Investing in good studio monitors and headphones is vital for accurate sound reproduction. Studio monitors provide a flat frequency response, allowing you to hear your mixes as they truly are. Closed-back headphones are excellent for tracking, while open-back headphones are great for mixing.
- Monitor Placement: Position your monitors at ear level and form an equilateral triangle with your listening position to achieve the best sound.
5. Microphones
Depending on your needs, you may require different types of microphones. A condenser mic is ideal for vocals and acoustic instruments, while dynamic mics are better suited for live performances and louder sound sources.
- Microphone Types: Consider having a versatile condenser mic for vocals and a dynamic mic for instruments or live recordings.
6. MIDI Controller
A MIDI controller can enhance your production capabilities, allowing you to play virtual instruments and control your DAW more intuitively. Look for one that fits your style, whether it’s a keyboard, pad controller, or something else.
- Choosing a MIDI Controller: Consider the number of keys, pads, and knobs, as well as the compatibility with your DAW. Some controllers come with built-in features like transport controls and faders, which can streamline your workflow.
7. Acoustic Treatment
To achieve professional sound quality, consider investing in acoustic treatment. This can include foam panels, bass traps, and diffusers to manage sound reflections and improve the overall acoustics of your space.
- Types of Acoustic Treatment: Foam panels can help absorb high frequencies, while bass traps are essential for controlling low frequencies. Diffusers scatter sound waves, preventing echoes and creating a more balanced sound environment.
Creating a Workflow
Once your equipment is set up, it’s time to establish a workflow that maximizes your creativity. Here are some tips to streamline your music production process:
Organize Your Projects
Keep your files organized. Create a folder structure that makes sense to you, and label your projects clearly. This will save you time and frustration when searching for specific files.
Use Templates
Create templates in your DAW for different types of projects. This can save you time and help you get into the creative zone faster. For example, set up a template for vocal recording, one for beat-making, and another for mixing.
Regular Breaks
Don’t forget to take breaks! Stepping away from your work can provide fresh perspectives and prevent burnout. Consider using techniques like the Pomodoro Technique, where you work for 25 minutes and then take a 5-minute break.
Advanced Techniques for Music Production
As you become more comfortable with your home studio setup, you may want to explore advanced techniques to enhance your music production skills.
Layering Sounds
Layering different sounds can create a richer and more complex audio experience. Experiment with stacking multiple instruments or vocal tracks to add depth to your music.
Automation
Utilizing automation in your DAW allows you to control various parameters over time, such as volume, panning, and effects. This can add movement and dynamics to your tracks, making them more engaging.
Sound Design
Delve into sound design by creating your own sounds using synthesizers or sampling. This can give your music a unique character and help you stand out in a crowded market.
Collaboration
Don’t hesitate to collaborate with other musicians or producers. This can lead to new ideas, techniques, and perspectives that can enhance your music production skills.
Conclusion
Setting up a professional music studio at home is an exciting journey that combines creativity with technical know-how. By carefully considering your space, investing in the right equipment, and establishing an efficient workflow, you can create an environment that fosters musical innovation. Remember, the most important aspect is to enjoy the process and let your creativity flow. With dedication and passion, your home studio can become a hub of musical exploration and production.
FAQ
How much does it cost to set up a home music studio?
The cost can vary widely based on your equipment choices. A basic setup might start around $500, while a more professional studio could easily exceed $5,000 or more.
Q1:
A1:
Q2: Do I need acoustic treatment for my home studio?
A2: While it’s not strictly necessary, acoustic treatment can significantly improve sound quality. It’s especially important if you’re recording or mixing music.
Q3: Can I produce music without a MIDI controller?
A3: Yes, you can produce music using just your computer and a DAW. However, a MIDI controller can enhance your workflow and make it easier to play virtual instruments.
Q4: What is the best DAW for beginners?
A4: For beginners, options like GarageBand (for Mac users), FL Studio, and Ableton Live Lite are user-friendly and offer a good range of features to get started.
Q5: How can I improve my mixing skills?
A5: Practice is key. Study mixing techniques, listen critically to professional mixes, and experiment with different approaches in your own projects. Online tutorials and courses can also provide valuable insights.
Q6: Is it necessary to have a professional microphone?
A6: While a professional microphone can enhance the quality of your recordings, you can still achieve good results with mid-range options. The key is to focus on technique and proper recording practices.
Q7: How do I choose the right studio monitors?
A7: Look for monitors that provide a flat frequency response and are suitable for your room size. It’s also beneficial to listen to different models before making a purchase to find the sound that you prefer.
Q8: Can I use my home studio for live streaming?
A8: Absolutely! With the right setup, including a good microphone, camera, and streaming software, you can use your home studio for live performances and content creation.
Q9: What are some common mistakes to avoid when setting up a home studio?
A9: Common mistakes include neglecting acoustic treatment, not investing in quality equipment, and failing to organize your


