
In a world increasingly focused on sustainability, clothing upcycling has emerged as a creative and eco-friendly trend. One of the simplest yet most rewarding projects you can undertake is transforming your old jeans into stylish shorts. Not only does this process breathe new life into your wardrobe, but it also allows you to express your unique style. So, roll up your sleeves and let’s dive into the delightful world of denim transformation!
Breathing new life into old clothes isn’t just a trendy pastime; it’s a powerful statement against fast fashion and a fantastic way to express your unique style. Among the myriad upcycling projects, transforming old jeans into stylish shorts stands out as a particularly rewarding endeavor. It’s a simple process that yields surprisingly fashionable results. This guide will walk you through the steps, ensuring you create a pair of shorts you’ll be proud to wear.
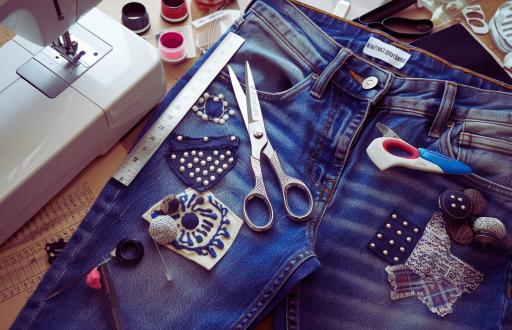
First, gather your materials. You’ll need a pair of jeans you’re willing to sacrifice, sharp fabric scissors (rotary cutters are a bonus), a ruler or measuring tape, tailor’s chalk or a fabric marker, and optionally, sandpaper or a seam ripper for a distressed look. Choosing the right jeans is crucial. Consider the fit around the hips and thighs; this will largely determine the final fit of your shorts. Jeans with a bit of stretch can offer more comfort, while thicker denim provides a more structured look.
Next, decide on the desired length. This is where your measuring tape comes in handy. Try on the jeans and mark the desired length with tailor’s chalk or a fabric marker. Remember to add an extra inch or two for hemming or fraying, depending on your preferred finish.
It’s always better to cut a little less and adjust later than to cut too much. A common mistake is cutting straight across; for a more flattering fit, consider a slight downward curve from the outer seam to the inner seam.
With your markings in place, carefully cut along the lines. This is where sharp scissors are essential for a clean, precise cut. If you’re using a rotary cutter, make sure you have a cutting mat underneath to protect your work surface. Once you’ve made the initial cut, try on the jeans again to double-check the length. It’s much easier to make small adjustments at this stage.
Now comes the fun part: finishing the edges. For a classic, clean look, you can hem the shorts. Fold the raw edge over by about half an inch, then fold it over again and pin it in place. Sew along the folded edge using a sewing machine or hand stitching.
Alternatively, for a more casual, frayed look, simply let the raw edges fray naturally over time. You can accelerate this process by washing and drying the shorts a few times. For a more controlled frayed look, use a seam ripper or sandpaper to gently distress the edges. This creates a beautifully textured effect.
Finally, consider adding embellishments. This is where you can truly personalize your creation. Add patches, embroidery, or even some strategically placed rips for an edgier vibe. The possibilities are truly endless, limited only by your imagination
Step 1: Gather Your Materials
Before you embark on this upcycling adventure, gather the necessary materials. You’ll need:
- A pair of old jeans (the more worn, the better!)
- Fabric scissors (sharp ones, please!)
- A ruler or measuring tape
- Tailor’s chalk or a fabric marker
- A sewing machine or needle and thread (if you’re feeling ambitious)
- Optional: embellishments like patches, studs, or fabric paint for a personalized touch

Step 2: Measure and Mark
Now that you have your materials, it’s time to measure. Decide how short you want your new shorts to be. A good rule of thumb is to measure about 4-6 inches above the knee, but this is entirely up to your personal style. Use the ruler to mark your desired length with tailor’s chalk. Remember, you can always cut more later, but you can’t add fabric back!
Step 3: Cut with Care
With your measurements marked, it’s time to cut! Take a deep breath and make your first snip. Cut straight across, following the line you’ve drawn. If you want a frayed look, cut a little longer than your mark, as the fabric will fray over time. For a cleaner finish, you might want to hem the edges later.
Step 4: Customize Your Creation
Here’s where the fun really begins! Your shorts are a blank canvas, ready for your artistic flair. Consider adding patches, embroidery, or even fabric paint to make them uniquely yours. If you’re feeling adventurous, you could even distress the fabric for a trendy, worn-in look. The possibilities are endless!
Step 5: Sew (Optional)
If you prefer a polished finish, now’s the time to sew. Fold the edges of your shorts under about half an inch and pin them in place. Using a sewing machine or needle and thread, sew along the hem to secure it. This step is optional, but it can help prevent fraying and give your shorts a more finished appearance.
Step 6: Try Them On!
Once you’ve completed your masterpiece, it’s time for the ultimate test: trying them on! Slip into your newly crafted shorts and admire your handiwork. If they fit perfectly, congratulations! If not, don’t fret. A little adjustment here and there can make all the difference.
Conclusion
Turning old jeans into stylish shorts is not just a fun DIY project; it’s a step towards sustainable fashion. By upcycling your clothing, you’re reducing waste and creating something uniquely yours. So, the next time you look at those old jeans gathering dust in your closet, remember: they have the potential to become your new favorite summer staple. Embrace your creativity, and let your style shine!
FAQ
Can I turn any type of jeans into shorts?
Absolutely! While denim jeans are the most common choice, you can also upcycle other types of pants. Just keep in mind the fabric and how it will hold up as shorts.
What if I don’t have a sewing machine?
No problem! You can hand-sew the hems or even use fabric glue for a no-sew option. Just ensure that the edges are secured to prevent fraying.
How can I prevent my shorts from fraying too much?
If you prefer a neater look, consider hemming the edges. Alternatively, you can use a fray check solution to seal the edges and prevent excessive fraying.
What if I make a mistake while cutting?
Mistakes happen! If you cut too short, consider adding a fabric panel or lace at the bottom for a stylish fix. Embrace the imperfections; they often lead to the most unique designs!
Can I sell my upcycled shorts?
Definitely! If you’ve created something you’re proud of, consider selling it online or at local craft fairs. Upcycled fashion is gaining popularity, and your unique designs could find a great audience!


