Transforming your home with unique, personalized touches doesn’t have to break the bank. In fact, some of the most charming décor pieces can be created with simple, everyday items. Take, for instance, the humble mason jar.
These versatile containers can be repurposed into stunning light fixtures, adding a touch of rustic elegance to any room. This article will guide you through the process of creating your own elegant mason jar light fixtures, offering a blend of simplicity and sophistication.
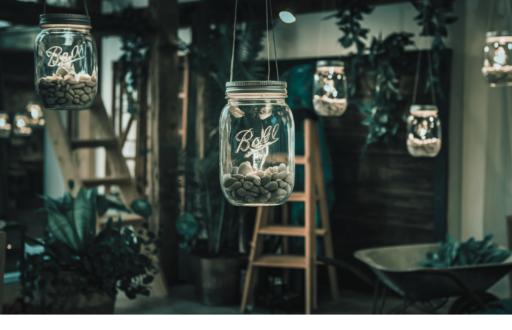
The beauty of mason jar light fixtures lies in their adaptability. Whether you prefer a vintage farmhouse vibe or a more modern industrial aesthetic, the design possibilities are virtually endless.
A single pendant light can cast a warm, inviting glow over a kitchen island, while a cluster of jars can create a dramatic statement piece in a dining room or entryway. Imagine a gentle cascade of light filtering through textured glass, adding a touch of whimsy and charm to your living space. This isn’t just about illumination; it’s about crafting an ambiance.
So, how do you actually bring these illuminating creations to life? The basic process involves a few key steps. First, you’ll need to gather your materials: mason jars (of course!), light sockets, wiring, light bulbs (Edison bulbs are a popular choice for their vintage appeal), and a ceiling canopy or fixture to mount your lights.
You might also want to consider additional embellishments like rope, wire cages, or paint to further customize your design. Selecting the right components is crucial; a mismatched socket can lead to frustration, while the right bulb can completely transform the fixture’s aesthetic.
Next comes the assembly. This typically involves drilling a hole in the mason jar lid for the wiring, carefully connecting the wires to the light socket, and then securing the socket to the lid. It’s important to exercise caution when working with electricity. If you’re not comfortable with electrical wiring, it’s always best to consult a qualified electrician. This isn’t a task to take lightly; safety should always be a top priority.
From there, you can get creative with the presentation. You could suspend the jars individually from different lengths of cord to create a staggered effect, or you could group them together on a single canopy for a more unified look.
Consider wrapping rope around the jar necks for a rustic touch, or painting the jars with frosted glass paint for a softer, diffused light. The possibilities are truly boundless. The simple act of adding a touch of twine can drastically alter the final product, demonstrating the power of small details.
Materials You’ll Need
Before you begin, gather the following materials:
- Mason Jars: Choose sizes that suit your space—quart jars for larger fixtures or pint jars for smaller ones.
- Light Bulbs: Opt for LED bulbs for energy efficiency and a warm glow.
- Light Sockets: These can be purchased at hardware stores or online.
- Wire or Chain: For hanging your fixtures.
- Ceiling Mount or Pendant Kit: Depending on your design choice.
- Drill with a Glass Drill Bit: To create holes in the mason jars.
- Wire Cutters: For trimming the wire or chain.
- Safety Gear: Gloves and goggles for protection while drilling.
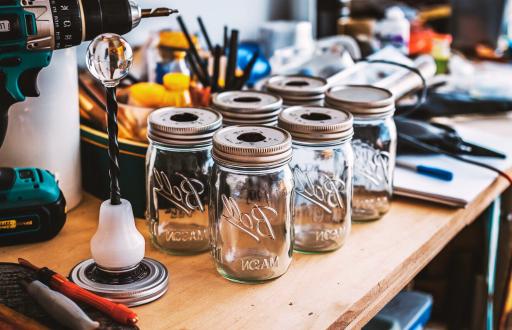
Step 1: Prepare the Mason Jars
Start by cleaning your mason jars thoroughly. Remove any labels and residue, ensuring they are completely dry. Once clean, use the drill with a glass drill bit to create a hole in the center of the lid of each jar. This hole will accommodate the light socket.
Tip: To prevent the glass from cracking, place a damp cloth under the jar while drilling. This helps keep the glass cool and reduces the risk of shattering.
Step 2: Assemble the Light Fixtures
Once the holes are drilled, it’s time to assemble the light fixtures. Insert the light socket through the hole in the lid, securing it in place. Follow the manufacturer’s instructions for wiring the socket to the light bulb.
Safety Note: Ensure that all electrical connections are secure and insulated to prevent any hazards.
Step 3: Choose Your Hanging Method
Decide how you want to hang your mason jar light fixtures. You can use wire or chain to suspend them from the ceiling. If you’re creating a pendant light, attach the wire or chain to the ceiling mount. For a more rustic look, consider using jute twine or rope.
Design Tip: Vary the lengths of the jars for a more dynamic appearance. This burst of height variation can create an eye-catching focal point in your room.
Step 4: Install the Fixtures
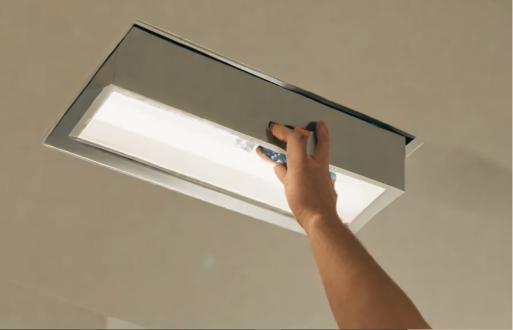
With your fixtures assembled and ready to go, it’s time to install them. If you’re using a ceiling mount, follow the instructions to secure it to the ceiling. Ensure that the electrical connections are properly made and that the power is turned off during installation.
Once everything is in place, hang your mason jars at your desired height.
Step 5: Add the Finishing Touches
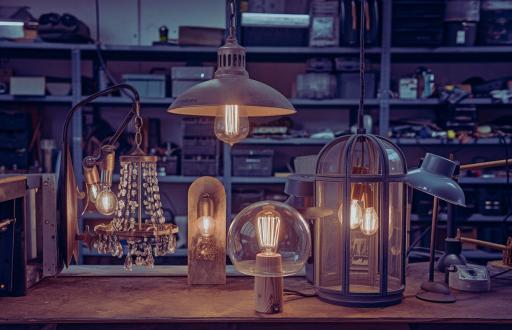
Now comes the fun part—adding your light bulbs! Choose bulbs that complement the ambiance you want to create. Soft white bulbs provide a cozy glow, while brighter bulbs can illuminate a workspace effectively.
For an added touch of elegance, consider embellishing the jars with decorative elements. You can wrap twine around the neck of the jar, add a sprig of greenery, or even paint the jars for a pop of color.
Step 6: Enjoy Your New Lighting
Once everything is installed and secure, turn on the power and bask in the warm, inviting glow of your new mason jar light fixtures. These charming additions not only brighten your space but also serve as a conversation starter for guests.
Conclusion:
Creating your own mason jar light fixtures is a rewarding DIY project that combines practicality with artistic expression. It’s a fantastic way to add a unique and personal touch to your home décor, while also being a relatively inexpensive undertaking. With a little creativity and some basic tools, you can transform ordinary mason jars into stunning light fixtures that will illuminate your home and impress your guests. This isn’t just about lighting a room; it’s about crafting an experience.
FAQ:
What type of light bulbs should I use?
Edison bulbs are a popular choice for their vintage aesthetic, but you can use any type of bulb that fits your socket. 1 Consider the color temperature and wattage to achieve your desired lighting effect. For example, warm white LEDs create a cozy atmosphere. 1. How to Make Mason Jar Lights: 14 Steps (with Pictures) – wikiHow www.wikihow.com
Is it safe to drill holes in mason jar lids?
Yes, but it’s important to use the correct tools and exercise caution. Use a drill bit designed for metal and wear safety glasses. Start with a small pilot hole and gradually increase the size.
Where can I find the necessary electrical components?
You can find light sockets, wiring, and other electrical supplies at most hardware stores or online retailers.
Can I use different sized mason jars?
Absolutely! Using different sized jars can add visual interest and create a more dynamic design.
How do I clean my mason jar light fixtures?
Simply dust them with a soft cloth. You can also carefully remove the jars and wash them with soap and water if needed. Allow them to dry completely before reassembling.


